
💡 I included the link to the example repository at the conclusion of this tutorial.
Next.js is an open-source React framework designed to simplify and enhance the development of web applications. It builds upon the foundation of React, offering additional features and optimizations specifically tailored for creating high-performance, SEO-friendly, and user-friendly applications. Here are some key aspects of Next.js:
Core Features:
- Hybrid Rendering: Next.js allows you to choose between static site generation (SSG) and server-side rendering (SSR) on a per-page basis. This flexibility enables you to optimize specific pages for performance (SSG) or interactivity (SSR) as needed.
- Data Fetching: Data fetching from APIs or databases either at build time (SSG) or at request time (SSR), ensuring seamless data integration within your application.
- File-System Routing: Pages and API routes are defined directly within the file system, promoting intuitive organization and developer experience.
- Performance Optimizations: Next.js automatically implements various optimizations like code splitting, image optimization, and prefetching, resulting in faster loading times and improved user experience.
- Community & Ecosystem: Backed by a large and active community, Next.js offers a rich ecosystem of plugins, libraries, and tools, expanding its capabilities and adapting to diverse development needs.
Benefits of Using Next.js:
- Simplified Development: Streamlined setup, intuitive routing, and built-in features accelerate development and enhance productivity.
- Improved Performance: SSG and SSR options, along with automatic optimizations, lead to faster loading times and a smoother user experience.
- Enhanced SEO: SSG pre-renders content, making it readily available to search engines and improving SEO potential.
- Scalability & Flexibility: Accommodates diverse project requirements and scales effectively for larger applications.
Who Uses Next.js?
- Companies like Netflix, Uber, and Starbucks leverage Next.js for their web applications, showcasing its reliability and scalability.
- Developers of all levels appreciate its developer-friendly approach and extensive community support.
If you’re looking for a modern and efficient framework to build performant, scalable, and user-friendly React applications, Next.js is an excellent choice. Its combination of flexibility, optimization features, and strong community support makes it a popular option for both individual developers and large companies.
This tutorial will guide you through the essential steps of building a CRUD application using Next.js. Get ready to harness the full potential of this powerful framework and create captivating web experiences!
Prerequisites
- Basic understanding of React and TypeScript
- Node.js, npm, and PostgreSQL installed on your system
Step 1: Project Setup
Open your terminal and run the following command:
npx create-next-app@latest blog-nextjs-crud
You will then be asked the following prompts:
Would you like to use TypeScript?  No / Yes
Would you like to use ESLint?  No / Yes
Would you like to use Tailwind CSS?  No / Yes
Would you like to use `src/` directory?  No / Yes
Would you like to use App Router? (recommended)  No / Yes
Would you like to customize the default import alias (@/*)?  No / Yes
Select the following options during the prompts:
- TypeScript: Yes
- ESLint: Yes
- Tailwind CSS: Yes
- src/ Directory: Yes
- App Router: Yes
- Custom Import Alias (@/*): No
This creates a Next.js project with TypeScript, ESLint, Tailwind CSS, and routing configured.
Install dependencies:
npm install
Start the development server:
npm run dev
You can access the development server at http://localhost:3000.
Step 2: Setting up Prisma
Prisma is an open-source database toolkit for Node.js and TypeScript that streamlines data access and management. It empowers developers to efficiently perform CRUD operations (Create, Read, Update, Delete) and interact with their databases in a type-safe and secure manner.
First, we need to add Prisma to our project as a development dependency:
npm install prisma --save-dev
Next, we initialize Prisma:
npx prisma init
This command creates a new prisma directory in your project, with a schema.prisma file inside. This file is used to define your database schema and models.
Update your schema.prisma file so it looks like this:
// prisma/schema.prisma

// This is your Prisma schema file,
// learn more about it in the docs: https://pris.ly/d/prisma-schema

// Generate the Prisma Client in JavaScript
generator client {
  provider = "prisma-client-js"
}

// This block of code defines the database connection. The database is a PostgreSQL database.
// The database connection URL will be read from an environment variable named `DATABASE_URL`.
datasource db {
  provider = "postgresql"
  url      = env("DATABASE_URL")
}

// This block of code defines a Post model
model Post {
  id        String   @id @default(cuid())
  title     String   @db.VarChar(255)       // will generate VARCHAR
  content   String                          // will generate TEXT
  createdAt DateTime @default(now())
  updatedAt DateTime @updatedAt
}
Then, you need to create a database. For PostgreSQL, you might use the CREATE DATABASE command:
# psql -U <username>
psql -U postgres

CREATE DATABASE blog_nextjs_crud;
Next, update your .env file to include the connection string for your database. Make sure to adjust this according to your database settings:
// .env
DATABASE_URL="postgresql://<username>:<password>@localhost:5432/blog_nextjs_crud?schema=public"
Then, run the following command:
npx prisma db push
Executing this command will do two things:
- Install
@prisma/client: This is a type-safe database client tailored to your database schema (defined inschema.prisma). It enables autocompletion and type safety in your TypeScript or JavaScript code. - Perform Database Migration: This operation updates your database schema to match your Prisma schema by creating, altering, or dropping tables and columns as necessary. It’s a way to synchronize your Prisma schema with your database schema. This is particularly useful during development. For production environments, consider using Prisma Migrate for more control over migrations.
Read also:
Step 3: Update Home Codes
Now, let’s update the Home page:
// src/app/page.tsx

// Importing the function to fetch posts from the database.
import { fetchPosts } from "@/db/queries/posts";
import Link from "next/link";
// Importing a component that handles post deletion.
import PostDelete from "@/components/post-delete";

export default async function Home() {
  const posts = await fetchPosts() // Fetching the posts from the database.
  const dateOptions: Intl.DateTimeFormatOptions = { // Options for formatting dates.
    year: 'numeric',
    month: 'long',
    day: 'numeric'
  };

  return (
    <main className="flex min-h-screen flex-col items-start p-24">
      <div className="mb-4">
        <Link href="/posts/create" className="bg-white px-4 py-2 rounded">Create Post</Link> // Link to create a new post.
      </div>
      <div className="mb-32 grid gap-x-8 gap-y-4 text-center lg:max-w-5xl lg:w-full lg:mb-0 lg:grid-cols-4 lg:text-left">
        {posts.map(post => { // Mapping over the posts and rendering each one.
          return <div key={post.id}>
            <div className="mb-4">
              <Link
                key={post.id}
                href={`/posts/${post.id}/edit`}
                className=""
              >
                <h2 className={`mb-3 text-2xl font-semibold`}>
                  {post.title}
                </h2>
              </Link>
              <p className={`m-0 max-w-[30ch] text-sm opacity-60`}>
                {post.content}
              </p>
            </div>
            <div className="text-sm opacity-30">{'Updated at ' + post.updatedAt.toLocaleDateString("en-US", dateOptions)}</div>
            <PostDelete id={post.id} />
          </div>
        })}
      </div>
    </main>
  );
}
Step 4: Create Fetching Code
In this step, you will create code to fetch data.
// src/db/index.ts
import { PrismaClient } from '@prisma/client'

export const db = new PrismaClient() // Creating a new instance of PrismaClient.
Next, create a fetching file for Post.
// src/db/queries/posts.ts

import type { Post } from '@prisma/client' // Importing the Post type from the Prisma client library.
import { db } from '@/db'
import { notFound } from 'next/navigation' // Importing the notFound function from Next.js for handling 404 errors.

export async function fetchPosts(): Promise<Post[]> {  // Function to fetch all posts from the database.
    return await db.post.findMany({
        orderBy: [
            {
                updatedAt: 'desc',
            }
        ],
    })
}

export async function fetchPostById(id: string): Promise<Post | null> { // Function to fetch a single post by its ID.
    const post = await db.post.findFirst({
        where: {
            id
        }
    })

    if (!post) {
        notFound() // If the post is not found, a 404 error is thrown.
    }

    return post
}
Step 5: Create a Create Post Page
Let’s create a page for creating a new post:
// src/app/posts/create/page.tsx
import { createPost } from "@/app/actions/posts";
import PostForm from "@/components/post-form";

// create a new server component PostsCreate.
export default function PostsCreate() {
    return (
        <main className="flex min-h-screen flex-col items-start p-24">
            <div className="mb-32 text-center lg:max-w-5xl lg:w-full lg:mb-0 lg:grid-cols-4 lg:text-left">
                // Renders a PostForm component, passing the createPost action as the form action
                // and an initial data object with empty title and content.
                <PostForm formAction={createPost} initialData={{ title: '', content: '' }} />
            </div>
        </main>
    );
}
Read also:
Step 6: Create an Edit Post Page
Next, let’s create a page for editing an existing post:
// src/app/posts/[id]/edit/page.tsx
// The [id] in the folder name indicates that this is a dynamic route, corresponding to a specific post ID.

import { updatePost } from "@/app/actions/posts";
import PostForm from "@/components/post-form";
import { fetchPostById } from "@/db/queries/posts";

interface PostsEditProps {
    params: {
        id: string;
    };
}

// Defining a new page, server component PostsEdit
export default async function PostsEdit({ params }: PostsEditProps) {
    // Receives params as a prop, which includes the id of the post to be edited.
    const { id } = params;

    // Fetches the post from the database
    const post = await fetchPostById(id)

    // binds the id to the updatePost action to create an updateAction,
    const updateAction = updatePost.bind(null, id)

    return (
        <main className="flex min-h-screen flex-col items-start p-24">
            <div className="mb-32 text-center lg:max-w-5xl lg:w-full lg:mb-0 lg:grid-cols-4 lg:text-left">
                // renders a PostForm component, passing the updateAction as the form action and the post data
                // as the initial data
                <PostForm formAction={updateAction} initialData={{ title: post?.title ?? '', content: post?.content ?? '' }} />
            </div>
        </main>
    );
}
Step 7: Create a PostForm Component
Now, let’s create a PostForm component that can be used for both creating and editing posts:
// src/components/post-form.tsx

// this is a client component
'use client'

import Link from "next/link"
import { useFormState } from "react-dom"

// Define the shape of the form errors
interface FormErrors {
    title?: string[],
    content?: string[],
}

// Define the shape of the form state
interface FormState {
    errors: FormErrors,
}

// Define the props that the PostForm component expects
interface PostFormProps {
    formAction: any, // The action to perform when the form is submitted
    initialData: { // The initial data for the form fields
        title: string,
        content: string,
    },
}

// The formAction is the action to perform when the form is submitted. We use it as a props because
// we will use this for create and edit page which both page doesn't have the same action
// The initialData is the initial data for the form fields.
export default function PostForm({ formAction, initialData }: PostFormProps) {
    // Initialize the form state and action
    const [formState, action] = useFormState<FormState>(formAction, {
        errors: {},
    })

    return <>
        <h1 className="text-3xl font-bold mb-6">{initialData.title ? 'Update' : 'Create'} Post</h1>
        <form action={action}>
            <div className="w-96">
                <div className="mb-4">
                    <label htmlFor="title" className="block mb-2">Title</label>
                    <input type="text" id="title" name="title" defaultValue={initialData.title} className="rounded p-2 w-full" />
                    {
                        formState.errors.title
                        && <div className="text-red-500">
                            {formState.errors.title?.join(', ')} // Display form errors related to the title field
                        </div>
                    }
                </div>
                <div className="mb-4">
                    <label htmlFor="content" className="block mb-2">Content</label>
                    <textarea id="content" name="content" defaultValue={initialData.content} className="rounded p-2 w-full"></textarea>
                    {
                        formState.errors.content
                        && <div className="text-red-500">
                            {formState.errors.content?.join(', ')} // Display form errors related to the content field
                        </div>
                    }
                </div>
                <div className="mb-4">
                    <button type="submit" className="bg-white px-4 py-2 rounded mr-2">Save</button>
                    <Link href="/" className="bg-transparent px-4 py-2 rounded">Cancel</Link>
                </div>
            </div>
        </form>
    </>
}
Step 8: Create a Delete Component
Now, let’s create a PostDelete component that can be used to delete posts from the home page:
// src/components/post-delete.tsx

// this is a client component, because we need to use client-side feature
'use client'

// Importing the function to delete posts.
import { deletePost } from "@/app/actions/posts";

// Define the props that the PostDelete component expects.
interface PostDeleteProps {
    id: string, // The ID of the post to delete.
}

export default function PostDelete({ id }: PostDeleteProps) {
    // Define the action to perform when the form is submitted.
    // This is how we do it if we omit the bind from the server action
    const deleteAction = (event: React.FormEvent<HTMLFormElement>) => {
        event.preventDefault(); // Prevent the form from being submitted in the traditional way.
        deletePost(id); // Delete the post with the given ID.
    };

    // Render a form with a single submit button. When the button is clicked, the form is submitted
    // and the deleteAction is performed.
    return <form onSubmit={deleteAction}>
        <button type="submit" className="text-sm opacity-30 text-red-500">Delete</button>
    </form>
}
Step 9: Install Zod for Validation
Before we proceed, let’s install the Zod package to handle validation. We will use this in the server action.
npm install zod
Read also:
Step 10: Create Server Actions
Let’s create server actions for Creating, Updating, and Deleting Posts.
// src/app/actions/posts.ts

// this is a server action
'use server'

// Import the database client and the Post type from Prisma
import { db } from '@/db'
import type { Post } from '@prisma/client'

// Import the revalidatePath and redirect functions from Next.js
import { revalidatePath } from 'next/cache'
import { redirect } from 'next/navigation'

// Import the Zod library for validation
import { z } from 'zod'

// Define a schema for the post using Zod
const postSchema = z.object({
    // the title must be a string between 3 and 255 characters
    title: z.string().min(3).max(255),
    // the content must be a string between 10 and 4000 characters
    content: z.string().min(10).max(4000),
})

// Define an interface for the form state
interface PostFormState {
    errors: {
        title?: string[],
        content?: string[],
        _form?: string[],
    }
}

// Define an asynchronous function to create a post
export async function createPost(
    formState: PostFormState,
    formData: FormData
): Promise<PostFormState> {
    // Validate the form data against the post schema
    // If the form data does not match the schema, the safeParse method returns an object
    // with a success property of false and an error property containing the validation errors.
    // If the form data matches the schema, the safeParse method returns an object
    // with a success property of true and a data property containing the validated data.
    const result = postSchema.safeParse({
        title: formData.get('title'),
        content: formData.get('content'),
    })

    // If validation fails, return the errors
    if (!result.success) {
        return {
            // The flatten method is used to convert the validation errors into a flat object structure
            // that can be easily displayed in the form.
            errors: result.error.flatten().fieldErrors
        }
    }

    let post: Post
    try {
        // If validation passes, create a new post in the database
        post = await db.post.create({
            data: {
                title: result.data.title,
                content: result.data.content,
            }
        })
    } catch (error: unknown) {
        // If there's an error, return it
        if (error instanceof Error) {
            return {
                errors: {
                    _form: [error.message],
                },
            }
        }
        else {
            return {
                errors: {
                    _form: ['Something went wrong'],
                },
            }
        }
    }

    // Revalidate the path and redirect to the home page
    revalidatePath('/')
    redirect('/')
}

export async function updatePost(
    id: string,
    formState: PostFormState,
    formData: FormData
): Promise<PostFormState> {
    const result = postSchema.safeParse({
        title: formData.get('title'),
        content: formData.get('content'),
    })

    if (!result.success) {
        return {
            errors: result.error.flatten().fieldErrors
        }
    }

    let post: Post
    try {
        post = await db.post.update({
            where: { id },
            data: {
                title: result.data.title,
                content: result.data.content,
            }
        })
    } catch (error: unknown) {
        if (error instanceof Error) {
            return {
                errors: {
                    _form: [error.message],
                },
            }
        }
        else {
            return {
                errors: {
                    _form: ['Something went wrong'],
                },
            }
        }
    }

    revalidatePath('/')
    redirect('/')
}

export async function deletePost(
    id: string,
): Promise<PostFormState> {
    let post: Post
    try {
        post = await db.post.delete({
            where: { id },
        })
    } catch (error: unknown) {
        if (error instanceof Error) {
            return {
                errors: {
                    _form: [error.message],
                },
            }
        }
        else {
            return {
                errors: {
                    _form: ['Something went wrong'],
                },
            }
        }
    }

    revalidatePath('/')
    redirect('/')
}
This code defines server actions for creating, updating, and deleting posts. It uses the Zod library to validate the form data, and the Prisma client to interact with the database.
If any errors occur during these operations, they are returned and can be handled appropriately. After a successful operation, the path is revalidated and the user is redirected to the home page.
The updatePost and deletePost functions follow the same pattern as the createPost function. They take an ID as an additional parameter to identify the post to update or delete.
The deletePost function does not need to validate any form data, as it only requires the ID of the post to delete. It still returns any errors that occur during the operation.
The revalidatePath function is used to ensure that the data on the page is up-to-date after a post is created, updated, or deleted. The redirect function is used to navigate the user to a different page after a successful operation. In this case, the user is redirected to the home page.
Step 11: Test the Site
You can test the site by running npm run dev and visiting localhost:3000.
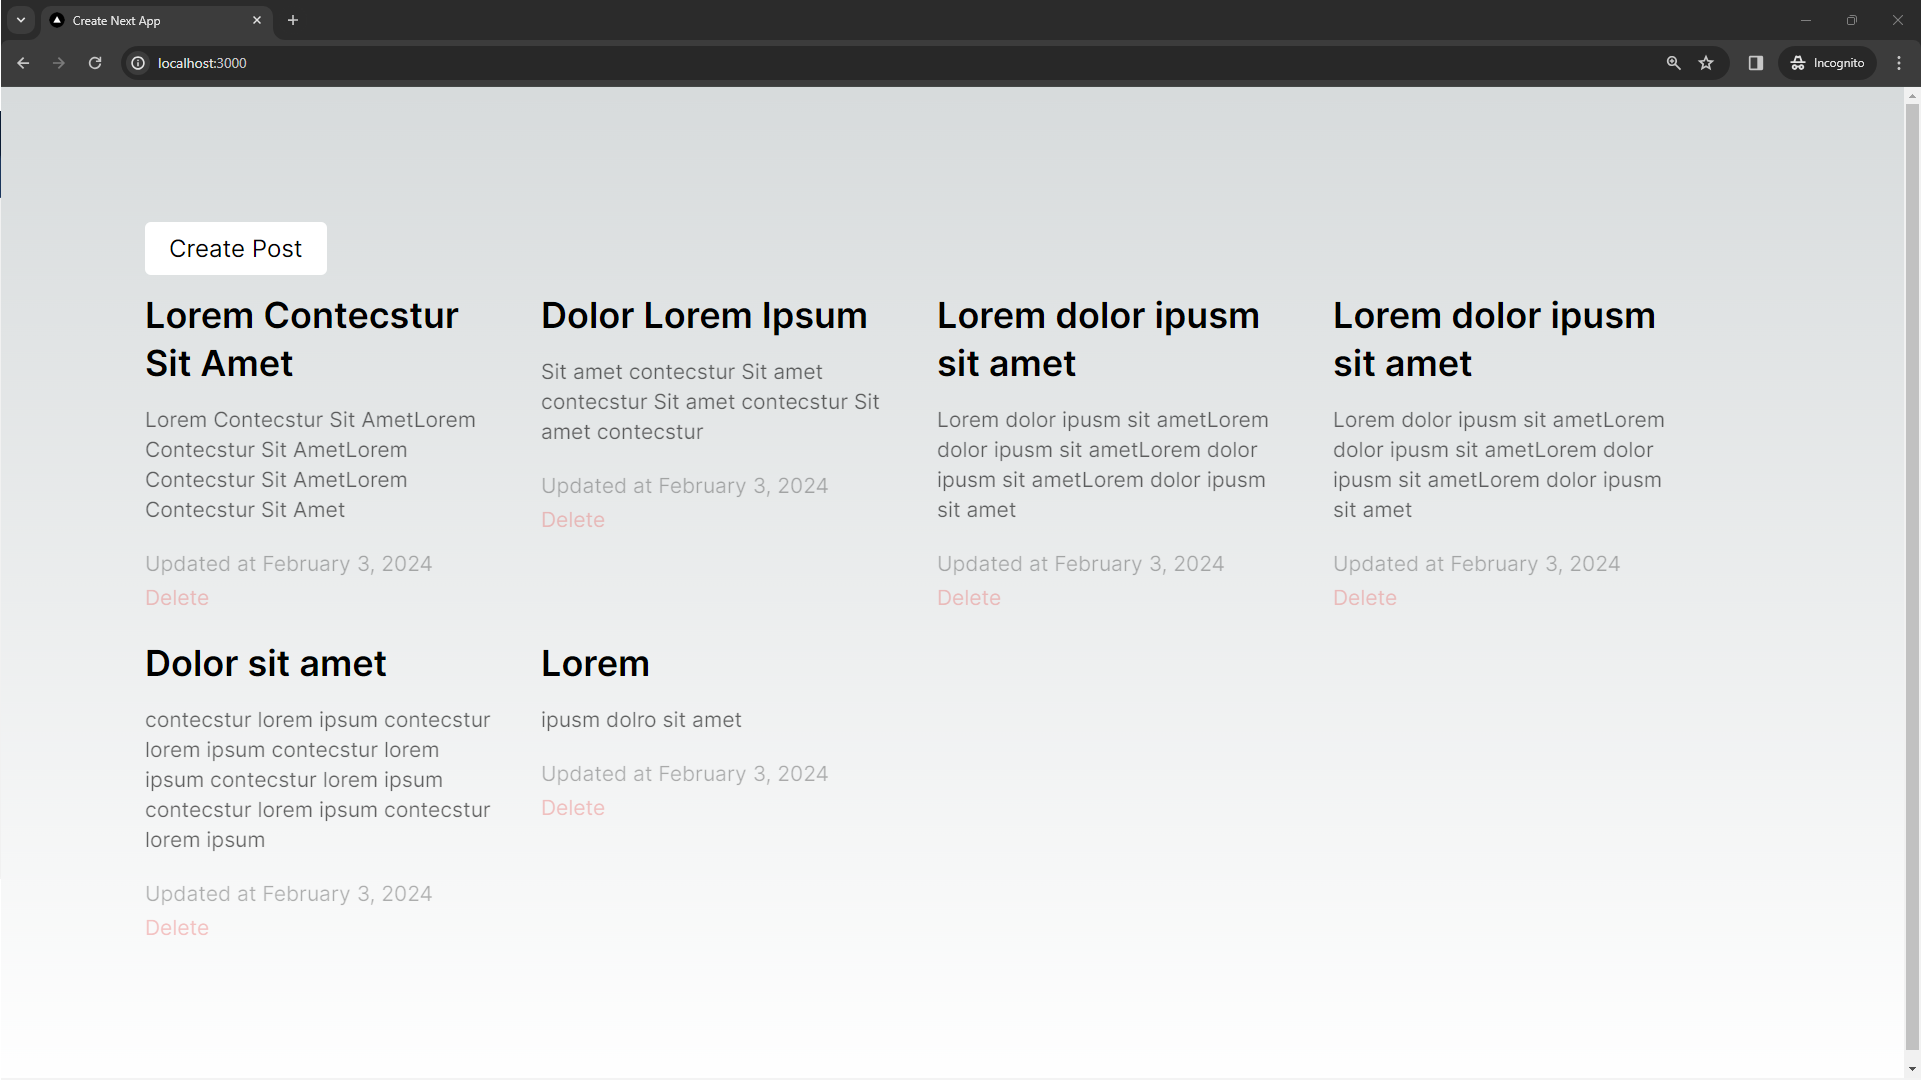
- Open the home page. It should display a list of posts. Each post should have a title and content.
- Click the “Create Post” button. You should be redirected to a new page with a form to create a post.
- If you fill in the form with the title less than 3 chars and the content less than 10 chars, then, you will trigger validation errors.
- You should be redirected back to the home page after submitted the create form, and your new post should appear in the list of posts.
- You can edit a post by clicking the title of the post you want to edit and you should be redirected to a new page with a form that is pre-filled with the current title and content of the post.
- If you try to edit a post that does not exist (for example, by manually changing the post ID in the URL), the website should handle this gracefully. You will be redirected to a 404 page.
- Click on the “Delete” button, and the post should be removed from the list of posts on the home page.
Conclusion
We’ve successfully set up a CRUD application using Next.js and Prisma. We’ve installed necessary packages, set up the database, created server actions for creating, updating, and deleting posts, and validated the data using Zod. We’ve also discussed how to test the site to ensure it’s working as expected. This application serves as a solid foundation for a full-featured blog, and can be further customized and expanded according to your needs. Happy coding! 🚀
💻 You can locate the repository for this example at fajarwz/blog-nextjs-crud.

