💡 I included the link to the example repository at the conclusion of this tutorial.
JavaScript is not only great for web development, but it’s also an excellent language for building powerful command-line tools with Node.js.
Why Build a CLI Tool in JavaScript?
Creating a CLI tool in JavaScript can be a game-changer for your productivity because:
✅ Familiarity: As a JavaScript developer, you already know the language, which makes it easy to get started.
✅ Cross-platform: With Node.js, your tool will run on all major platforms, including Windows, macOS, and Linux.
✅ Quick and Simple: Building a CLI tool for common workflows can save you time by streamlining everyday tasks like Git operations, file management, or project setup.
In software development, we often find ourselves repeating tasks. These tasks might range from managing Git operations to system configurations or deployment processes. Wouldn’t it be great if there was a way to streamline these tasks, making them more efficient and less error-prone? This is where CLI tools come into play.
In this article, you will learn how to build a simple CLI tool in JavaScript that can help simplify and streamline your development workflows, particularly when it comes to automating basic but repetitive tasks like Git operations.
Creating a Simple CLI Tool in JavaScript
Let’s dive into building a basic CLI tool that performs Git operations. For this, we’ll use Commander.js, Inquirer.js, and Simple Git.
Step 1: Setting Up the Project
Start by initializing a new Node.js project:
mkdir git-wizard
cd git-wizard
npm init -y
Then, install the necessary dependencies:
npm install commander inquirer chalk simple-git
Here is what we are installing:
✅ commander: Helps you define and manage your CLI commands and arguments.
✅ inquirer: Provides an interactive way to ask users for input during the execution of the tool.
✅ chalk: Adds color to terminal output, making your CLI tool more user-friendly.
✅ simple-git: Allows you to interact with Git repositories programmatically.
Step 2: Setting Up Basic CLI Commands
In this step, we are going to create the core functionality for git-wizard. We’ll define essential commands to streamline common Git tasks, such as initializing a repository, creating a new feature branch, committing with a message, and pushing your changes. These commands will be accessible via the terminal, making it easy for users to automate and simplify their Git workflows.
Create a new file at src/index.js and add the following code:
#!/usr/bin/env node
import { program } from 'commander';
import init from './commands/init.js';
import newFeature from './commands/new-feature.js';
import commit from './commands/commit.js';
import push from './commands/push.js';
import simpleGit from 'simple-git';
import inquirer from 'inquirer';
import chalk from 'chalk';
import fs from 'fs';
import path from 'path';
const git = simpleGit();
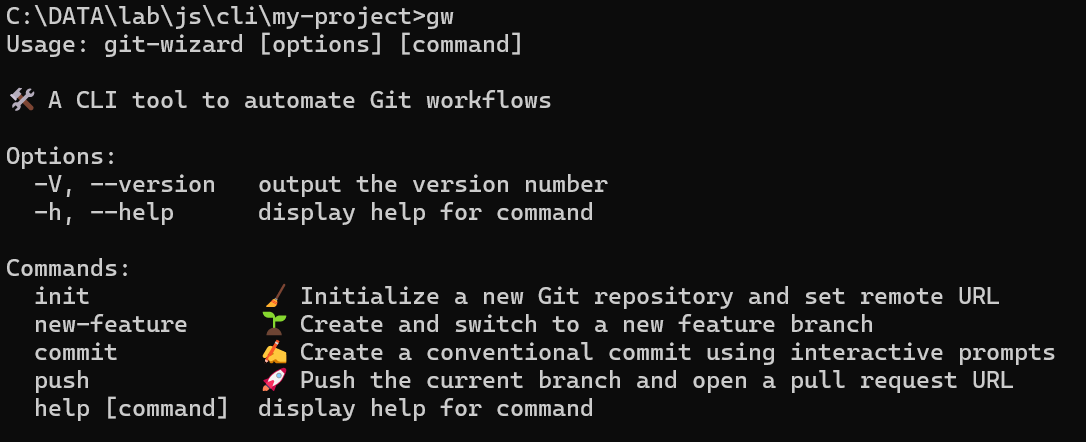
program.name('git-wizard').description('🛠️ A CLI tool to automate Git workflows').version('1.0.0');
program.command('init').description('🧹 Initialize a new Git repository and set remote URL')
.action(() => init({ inquirer, git, chalk, fs, path }));
program.command('new-feature').description('🌱 Create and switch to a new feature branch')
.action(() => newFeature({ inquirer, git, chalk }));
program.command('commit').description('✍️ Create a conventional commit using interactive prompts')
.action(() => commit({ inquirer, git, chalk }));
program.command('push').description('🚀 Push the current branch and open a pull request URL')
.action(() => push({ git, chalk }));
program.parse(process.argv);
We are using the commander library to define the CLI commands for our tool. The first line #!/usr/bin/env node ensures the script runs as an executable from the command line.
We import the necessary functions (init, newFeature, commit, push) from their respective command files located in the commands directory.
We set up the CLI using program.name('git-wizard') to define the name of our tool and program.description('...') to provide a short description. We also specify the version with .version('1.0.0').
Each command is defined using program.command(). For instance:
- The
initcommand initializes a Git repository and sets the remote URL, handled by theinitfunction. - The
new-featurecommand creates and switches to a new feature branch, managed by thenewFeaturefunction. - The
commitcommand lets the user create a conventional commit through interactive prompts, executed by thecommitfunction. - The
pushcommand pushes the current branch and generates a pull request URL, controlled by thepushfunction.
Finally, program.parse(process.argv) processes the command-line arguments, triggering the appropriate command based on the user’s input.
Why ESM Instead of CommonJS?
We’re using ES Modules (ESM) in this project for a few key reasons:
- Modern Syntax: ESM is the standard for writing modular JavaScript in both browser and Node environments.
- Compatibility: Some modern libraries, like the latest version of
chalk, are now ESM-only and cannot be imported usingrequire(). The alternative is to use v4. - Future-proofing: Node.js has fully supported ESM since v14+.
If you’re using ESM in Node.js, make sure your package.json includes:
"type": "module"
This tells Node to treat .js files as ES modules instead of CommonJS.
Step 3: Building the commit Command
In this step, we’ll implement the commit command in our CLI tool. This command helps reduce manual effort for one of the most repetitive tasks: creating clear and consistent Git commit messages.
Start by creating the file: src/commands/commit.js
Paste in the following code:
export default async function commit({ inquirer, git, chalk }) {
  try {
    const answers = await inquirer.prompt([
      {
        type: 'list',
        name: 'type',
        message: 'Type:',
        choices: ['feat', 'fix', 'chore', 'docs', 'style', 'refactor', 'test'],
      },
      {
        type: 'input',
        name: 'scope',
        message: 'Scope (optional):',
      },
      {
        type: 'input',
        name: 'message',
        message: 'Message:',
        validate: input => input ? true : 'Commit message cannot be empty',
      },
    ]);

    const { type, scope, message } = answers;

    const commitMsg = scope.trim()
      ? `${type}(${scope.trim()}): ${message.trim()}`
      : `${type}: ${message.trim()}`;

    await git.add('.');
    await git.commit(commitMsg);

    console.log(chalk.green(`✅ Committed: ${commitMsg}`));
  } catch (error) {
    console.error(chalk.red('Error during commit:'), error);
  }
}
We are using inquirer to prompt the user for information needed to construct a conventional commit message. The user selects a commit type (like feat, fix, or docs), optionally enters a scope, and must provide a commit message.
We destructure the user’s input and build the commit message. If the user provides a scope, the message will be in the format type(scope): message; otherwise, it’s just type: message.
We use simpleGit to stage all changes with git.add('.') and then commit them with the generated message using git.commit().
We use chalk to show a green success message with the final commit text. If something goes wrong, the error is caught and shown in red for clarity.
This command enforces conventional commit standards without requiring you to memorize the format. It’s also great for teams who want consistent history across pull requests, changelogs, or releases.
Here’s an example output:
? Type: (Use arrow keys)
❯ feat
  fix
  chore
  docs
  ...
? Scope (optional): auth
? Message: add JWT-based login
✅ Committed: feat(auth): add JWT-based login
In the next step, we’ll build the init command to bootstrap a Git repository and set a remote URL. Let’s keep going.
Step 4: Setting Up the init Command
Let’s automate the typical steps you take when starting a new Git project:
- Initialize the repo
- Add a remote
- Create a
.gitignorefile
With the init command, we’ll guide the user through this process interactively.
Create a file called src/commands/init.js, and add this code:
export default async function init({ inquirer, git, chalk, path, fs }) {
  try {
    // Initialize Git repository
    await git.init();
    console.log(chalk.green('✅ Initialized repo'));

    // Check if remote "origin" already exists
    const remotes = await git.getRemotes(true);
    const originRemote = remotes.find(remote => remote.name === 'origin');

    if (!originRemote) {
      // Get the project folder name for default remote URL
      const projectName = path.basename(process.cwd());

      // Prompt for GitHub username
      const { username } = await inquirer.prompt([
        {
          type: 'input',
          name: 'username',
          message: 'Enter your GitHub username:',
          validate: input => input ? true : 'Username cannot be empty',
        },
      ]);

      const defaultRemoteUrl = `git@github.com:${username}/${projectName}.git`;

      // Prompt user for the remote URL
      const { remoteUrl } = await inquirer.prompt([
        {
          type: 'input',
          name: 'remoteUrl',
          message: 'Enter remote repository URL:',
          default: defaultRemoteUrl,
        },
      ]);

      await git.addRemote('origin', remoteUrl);
      console.log(chalk.green(`✅ Added origin: ${remoteUrl}`));
    } else {
      console.log(chalk.yellow('ℹ️ Remote "origin" already exists.'));
    }

    // Check if a .gitignore file already exists
    const gitignorePath = path.join(process.cwd(), '.gitignore');
    if (!fs.existsSync(gitignorePath)) {
      // Prompt to create a default .gitignore file
      const { createGitignore } = await inquirer.prompt([
        {
          type: 'confirm',
          name: 'createGitignore',
          message: 'Create a default .gitignore file?',
          default: true,
        },
      ]);

      if (createGitignore) {
        const gitignoreContent = `node_modules
.DS_Store
.env
`;
        fs.writeFileSync(gitignorePath, gitignoreContent);
        console.log(chalk.green('✅ .gitignore created.'));
      }
    } else {
      console.log(chalk.yellow('ℹ️  .gitignore already exists.'));
    }
  } catch (error) {
    console.error(chalk.red('Error during init:'), error);
  }
}
We are using simpleGit to initialize a new Git repository with git.init().
We check if a remote named origin already exists. If not, we prompt the user for their GitHub username and use it to suggest a default remote URL like git@github.com:username/project-folder.git.
We are using inquirer to let the user confirm or change this remote URL, and then we add it with git.addRemote.
We check if a .gitignore file exists. If it doesn’t, we prompt the user to create one, and if they agree, we write a basic .gitignore with common entries like node_modules and .env.
We are using chalk for colored console output, and any errors are caught and printed in red for clarity.
Here’s how it looks when running git-wizard init:
✅ Initialized repo
? Enter your GitHub username: johndoe
? Enter remote repository URL: git@github.com:johndoe/my-project.git
✅ Added origin: git@github.com:johndoe/my-project.git
? Create a default .gitignore file? Yes
✅ .gitignore created.
If the remote or .gitignore already exists:
ℹ️ Remote "origin" already exists.
ℹ️ .gitignore already exists.
Step 5: Creating a New Feature Branch
In src/commands/new-feature.js, we’ll create a command that helps users generate a new branch for feature development using a naming convention.
export default async function newFeature({ inquirer, git, chalk }) {
  try {
    const { featureName } = await inquirer.prompt([
      {
        type: 'input',
        name: 'featureName',
        message: 'Feature name:',
        validate: input => input ? true : 'Feature name cannot be empty',
      },
    ]);

    // Construct branch name
    const branchName = `feature/${featureName.trim()}`;

    // Create and checkout the new branch
    await git.checkoutLocalBranch(branchName);
    console.log(chalk.green(`✅ Switched to ${branchName}`));
  } catch (error) {
    console.error(chalk.red('Error during new-feature:'), error);
  }
}
We are using inquirer again to interactively ask the user for a feature name.
After getting the input, we generate the branch name by prepending feature/ to the user’s input. This is a common Git convention to keep branches organized by type (e.g., feature/login-page).
We are using simpleGit to both create and switch to the new branch using checkoutLocalBranch(), making it a one-step process.
Lastly, we show a green confirmation message using chalk, or display a red error if anything goes wrong.
Step 6: Pushing the Current Branch and Generating a Pull Request URL
In src/commands/push.js, we’ll create a command to push the current branch to the remote origin and then generate a link to open a pull request on GitHub.
export default async function push({ git, chalk }) {
  try {
    // Get the current branch name
    const status = await git.status();
    const branch = status.current;

    // Push current branch to remote 'origin'
    await git.push('origin', branch);
    console.log(chalk.green(`✅ Pushed to origin/${branch}`));

    // Get remote URL from Git configuration
    const remotes = await git.getRemotes(true);
    const origin = remotes.find(r => r.name === 'origin');
    if (!origin) {
      console.error(chalk.red('Error: No remote named "origin" found.'));
      return;
    }

    // Extract the fetch URL (e.g., git@github.com:username/repo.git)
    const remoteUrl = origin.refs.fetch;
    // Parse the username and repository name from the URL using regex
    const match = remoteUrl.match(/git@github\.com:(.+?)\/(.+?)\.git/);
    if (!match) {
      console.error(chalk.red('Error: Remote URL is not in the expected format.'));
      return;
    }

    const username = match[1];
    const repo = match[2];
    // Construct a pull request URL (placeholder)
    const prUrl = `https://github.com/${username}/${repo}/compare/${branch}?expand=1`;

    console.log(chalk.blue(`🔗 Open PR: ${prUrl}`));
  } catch (error) {
    console.error(chalk.red('Error during push:'), error);
  }
}
We are using simpleGit to get the current branch with git.status(). This ensures that we push the correct branch to the remote repository.
The branch is pushed to the origin remote using git.push('origin', branch), and we notify the user with a green success message using chalk.
Next, we fetch the remotes with git.getRemotes() and extract the remote URL for origin. We check if the URL format matches the expected pattern (for GitHub), and if it does, we parse out the username and repository name using a regular expression.
Finally, we construct a pull request URL in the format https://github.com/username/repo/compare/branch, which the user can open in their browser to create a pull request. The URL is printed in blue for clarity.
Now that all the commands are working, let’s wrap things up by adjusting the project metadata.
Step 7: Update the Project Metadata
In this step, we’ll configure the essential information inside package.json, including the CLI entry points.
Update your package.json with the following settings:
{
  "name": "@your-username/git-wizard",
  "version": "1.0.0",
  "description": "A CLI tool to automate Git workflows",
  "main": "src/index.js",
  "keywords": [
    "git",
    "workflows",
    "automation"
  ],
  "author": "fajarwz",
  "license": "ISC",
  "type": "module",
  "bin": {
    "git-wizard": "./src/index.js",
    "gw": "./src/index.js"
  },
  "dependencies": {
    //...
  }
}
We’re setting the project’s name, version, and a short description to make it easy to understand what the tool does. The main field points to our entry file, which is src/index.js.
The keywords array helps improve the discoverability of the package if published on npm. The author field is set to your name or handle, and we’re using the “ISC” license for simplicity.
We set the type to module so we can use modern JavaScript syntax like import and export.
Finally, the bin field is where we define the command-line entry points. By mapping both git-wizard and gw to src/index.js, users will be able to run the CLI using either command in their terminal.
With our package.json set up, we now have a clear structure for our CLI tool, from metadata to command-line entry points. This setup lays the foundation for a smooth development experience and a convenient way for users to interact with the tool.
Step 8: Try It Out
To test git-wizard locally without publishing it to npm, you can use the npm link command. In the root of your project (where package.json is):
npm link
This creates a global symlink so you can run the CLI from anywhere using:
git-wizard
# or
gw
You can now test the CLI just like a globally installed package:
gw init
gw new-feature
gw commit
gw push
If you need to unlink it later:
npm unlink gw
Here are the usage examples:


Tip: Every time you update the CLI code, you can test immediately—no need to re-link unless you change the bin field in package.json.
Publishing to npm
Once your CLI tool is ready, you can publish it to npm so others (and future you) can install and use it globally.
Step 1: Sign in or create an npm account
If you don’t have an npm account yet, create one with:
npm adduser
Or log in with:
npm login
Step 2: Name your package
Make sure your name in package.json is unique across npm. You can check availability by searching on npmjs.com.
If you want to scope it to your username or organization, use:
"name": "@your-username/git-wizard"
Step 3: Mark it as executable
We already added it, but just make sure to add a Shebang at the very top of your src/index.js file so it can be executed from the command line:
#!/usr/bin/env node
Step 4: Publish
If it’s your first time publishing:
npm publish --access public
For scoped packages (@your-username/package-name), you must use --access public.
From then on, you can publish new versions with:
npm version patch    # or minor/major
npm publish
Step 5: Install and use globally
Once published, you (or others) can install it globally with:
npm install -g @your-username/git-wizard
Now you can run it anywhere using git-wizard or gw.
Conclusion
Building a CLI tool in JavaScript can dramatically improve your development workflow, especially when working with repetitive tasks. By using commander.js, inquirer.js, and simple-git, you can create a tool that streamlines tasks like initializing Git repositories, committing changes, and pushing to remote repositories with just a few simple commands.
One of the biggest advantages of using JavaScript (via Node.js) for CLI development is accessibility. If you’re already comfortable with JavaScript for web development, there’s no need to learn another language just to build automation tools. The Node.js ecosystem is rich, well-documented, and packed with powerful libraries that make scripting fast and intuitive.
Instead of juggling multiple terminal commands every time, a CLI tool helps reduce context switching and ensures your workflow stays fast, consistent, and error-free.
So if you often repeat the same steps across projects, try building your own CLI tool. It’s a surprisingly simple way to boost your productivity and bring a bit of joy back into your development flow.
💻 The repository for this example can be found at fajarwz/git-wizard.
💡 Thanks for reading all the way to the end. If you found this helpful, please like or star the Github repo so I know it’s really helpful. Otherwise, let me know what I can improve in the comment or email.