
💡 I included the link to the example repository at the conclusion of this tutorial.
Imagine creating web applications that respond instantly, where data updates and interactions happen in the blink of an eye. Welcome to the world of real-time web development. In this article, we’ll try to create a simple example of how to use WebSocket connection in Laravel application using Soketi.
We’ll introduce Soketi, set up the necessary tools, and configure Laravel to work with WebSockets. By the end of this article, you’ll have a basic WebSocket system ready to go.
What is Soketi?
Soketi is a simple, fast, and resilient open-source WebSockets server. It simplifies the WebSocket setup process, allowing you to focus on building real-time features without the complexities of WebSocket server management.
Installation
You can read more about Soketi installation instructions in the Soketi official docs.
Before installing the CLI Soketi WebSockets server, make sure you have the required tools:
- Python 3.x
- GIT
- The gcc compiler and the dependencies for build
Read more about CLI installation.
Step 1: Install Soketi
Begin by installing Soketi globally via npm. Open your terminal and run the following command:
npm install -g @soketi/soketi
This command will install Soketi on your system, allowing you to run it from the command line.
Step 2: Start Soketi Server
With Soketi installed, start the WebSocket server using this command:
soketi start
Soketi will now serve as the WebSocket server for your Laravel application.
Step 3: Install Required Packages
We’ll use the Pusher protocol with Soketi. The pusher/pusher-php-server library provides a PHP interface for the Pusher API, which allows you to send and receive messages from Pusher channels.
composer require pusher/pusher-php-server
For receiving events on the client-side, you’ll also need to install two packages using NPM:
npm install --save-dev laravel-echo pusher-js
These steps will set us up for seamless real-time communication in our Laravel application.
Step 4: Configure Broadcasting
Next, configure broadcasting in Laravel. Open the config/broadcasting.php file and add or modify the Pusher configuration as follows:
'connections' => [

        'pusher' => [
            'driver' => 'pusher',
            'key' => env('PUSHER_APP_KEY'),
            'secret' => env('PUSHER_APP_SECRET'),
            'app_id' => env('PUSHER_APP_ID'),
            'options' => [
                'cluster' => env('PUSHER_APP_CLUSTER'),
                'host' => env('PUSHER_HOST') ?: 'api-'.env('PUSHER_APP_CLUSTER', 'mt1').'.pusher.com',
                'port' => env('PUSHER_PORT', 443),
                'scheme' => env('PUSHER_SCHEME', 'https'),
                'encrypted' => true,
                'useTLS' => env('PUSHER_SCHEME', 'https') === 'https',
            ],
            'client_options' => [
                // Guzzle client options: https://docs.guzzlephp.org/en/stable/request-options.html
            ],
        ],
        // ...
This configuration sets up Pusher as the broadcasting driver for WebSockets.
Read also:
Step 5: Set Environment Variables
Now, configure the Pusher environment variables in your .env file. Replace the placeholders with your Pusher credentials:
BROADCAST_DRIVER=pusher

# other keys ...

PUSHER_APP_ID=app-id
PUSHER_APP_KEY=app-key
PUSHER_APP_SECRET=app-secret
PUSHER_HOST=127.0.0.1
PUSHER_PORT=6001
PUSHER_SCHEME=http
PUSHER_APP_CLUSTER=mt1

VITE_APP_NAME="${APP_NAME}"
VITE_PUSHER_APP_KEY="${PUSHER_APP_KEY}"
VITE_PUSHER_HOST="${PUSHER_HOST}"
VITE_PUSHER_PORT="${PUSHER_PORT}"
VITE_PUSHER_SCHEME="${PUSHER_SCHEME}"
VITE_PUSHER_APP_CLUSTER="${PUSHER_APP_CLUSTER}"
These variables are essential for Laravel to connect to the WebSocket server.
By default, when we start the Soketi server without additional configuration, it will run on 127.0.0.1:6001 and use the following application credentials:
- App ID: app-id
- App Key: app-key
- Secret: app-secret
These credentials play a crucial role in authenticating your frontend and backend applications, enabling them to send and receive real-time messages. It’s important to note that for production use, you should strongly consider changing these default settings to enhance security and ensure the smooth operation of Soketi.
Step 6: Configure JavaScript for Laravel Echo
In your JavaScript file (typically resources/js/bootstrap.js), configure Laravel Echo to use Pusher:
import Echo from 'laravel-echo';

import Pusher from 'pusher-js';
window.Pusher = Pusher;

window.Echo = new Echo({
    broadcaster: 'pusher',
    key: import.meta.env.VITE_PUSHER_APP_KEY,
    cluster: import.meta.env.VITE_PUSHER_APP_CLUSTER ?? 'mt1',
    wsHost: import.meta.env.VITE_PUSHER_HOST ? import.meta.env.VITE_PUSHER_HOST : `ws-${import.meta.env.VITE_PUSHER_APP_CLUSTER}.pusher.com`,
    wsPort: import.meta.env.VITE_PUSHER_PORT ?? 80,
    wssPort: import.meta.env.VITE_PUSHER_PORT ?? 443,
    forceTLS: (import.meta.env.VITE_PUSHER_SCHEME ?? 'https') === 'https',
    enabledTransports: ['ws', 'wss'],
});
This JavaScript setup allows your Laravel frontend app to communicate with the WebSocket server.
Step 7: Create a Broadcast Event
Now, let’s create a Laravel event that you want to broadcast using WebSockets. For this example, we’ll create a simple event called NewEvent. Create a new file in the app/Events directory called NewEvent.php. We can make the event with the following command:
php artisan make:event NewEvent
Update the NewEvent.php with the following codes:
namespace App\Events;

use Illuminate\Broadcasting\Channel;
use Illuminate\Broadcasting\InteractsWithSockets;
use Illuminate\Broadcasting\PresenceChannel;
use Illuminate\Broadcasting\PrivateChannel;
use Illuminate\Contracts\Broadcasting\ShouldBroadcast;
use Illuminate\Foundation\Events\Dispatchable;
use Illuminate\Queue\SerializesModels;

// make sure to implement the ShouldBroadcast interface.
// This is needed so that Laravel knows to broadcast the event over a WebSocket connection
class NewEvent implements ShouldBroadcast
{
    use Dispatchable, InteractsWithSockets, SerializesModels;

    public $message;

    public function __construct($message)
    {
        $this->message = $message;
    }

    public function broadcastOn(): array
    {
        return [
            // we'll broadcast the event on a public channel called new-public-channel.
            new Channel('new-public-channel'),
        ];
    }
}
This event will be broadcasted to the specified channel.
Step 8: Broadcast the Event
In your Laravel routes (e.g., routes/web.php), create a route that dispatches the event:
use App\Events\NewEvent;

Route::get('/event', function () {
    NewEvent::dispatch(request()->msg);

    return 'Message sent!';
});
This route will dispatch the NewEvent event when accessed, simulating a real-time event trigger.
Step 9: Listen for the Event in JavaScript
In your JavaScript, you can now listen for the broadcasted event and handle it accordingly. For example:
// resources/js/bootstrap.js

window.Echo = new Echo({
    // ...
});

window.Echo.channel("new-public-channel").listen("NewEvent", (e) => {
  console.log(e);
});
This JavaScript code listens for the NewEvent broadcast on the new-public-channel and logs the event data.
Read also:
Step 10: Include the app.js in Our Laravel Frontend
To enable event reception, we need to include app.js, which imports bootstrap.js, in our Laravel frontend. For example, let’s include it in the welcome.blade.php file:
<html lang="{{ str_replace('_', '-', app()->getLocale()) }}">
    <head>
        <meta charset="utf-8">
        <meta name="viewport" content="width=device-width, initial-scale=1">

        <title>Laravel</title>

        <!-- Fonts -->
        <link rel="preconnect" href="https://fonts.bunny.net">
        <link href="https://fonts.bunny.net/css?family=figtree:400,600&display=swap" rel="stylesheet" />

        <!-- Styles -->
        <style>
            <!-- long css -->
        </style>
        <!-- include app.js -->
        @vite(['resources/js/app.js'])
    </head>
Step 11: Test the WebSocket
To test your WebSocket implementation, follow these steps:
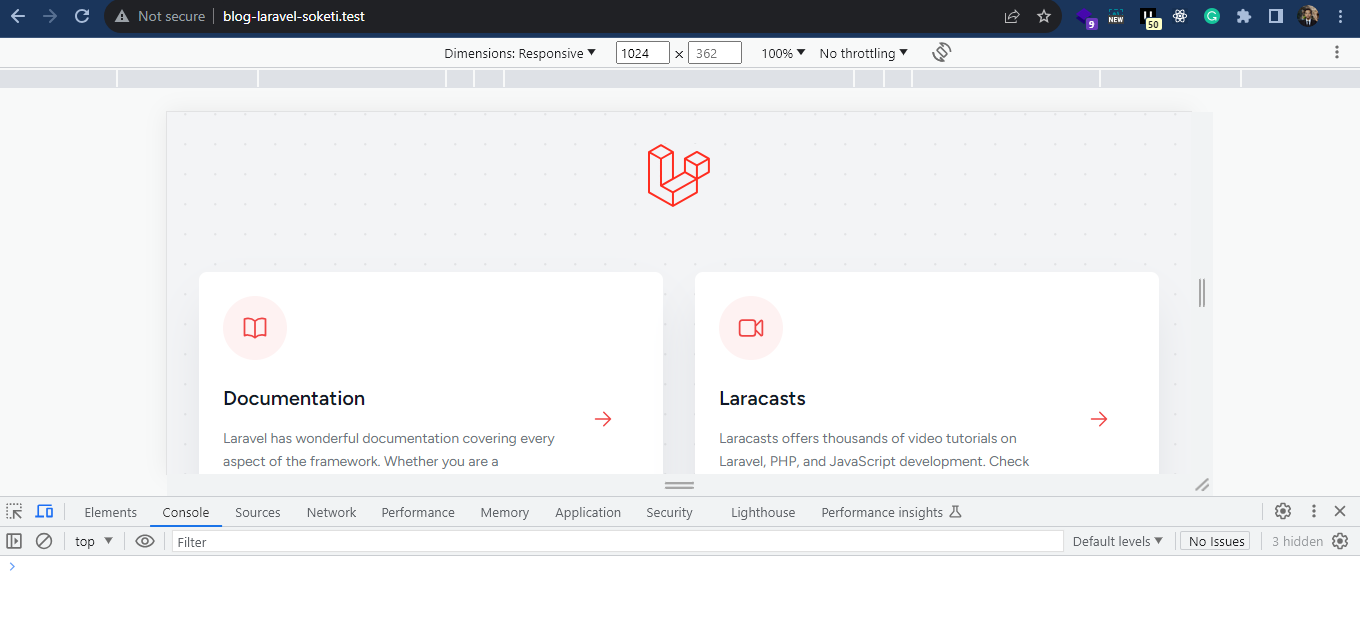
- Visit the home page that serves
welcome.blade.php(e.g.,http://127.0.0.1:8000) and open the Developer Tools and navigate to Console tab.![home.png]()
- Open a new tab in your web browser.
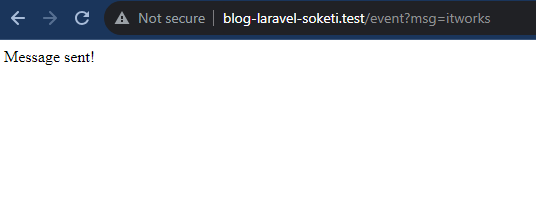
- Visit the
/eventroute in your Laravel application. - Add an additional query parameter, for example,
/event?msg=itworks, to send an event with a message. This action will dispatch theNewEventevent and trigger the JavaScript listener, allowing you to test and verify your WebSocket functionality.![event-route.png]()
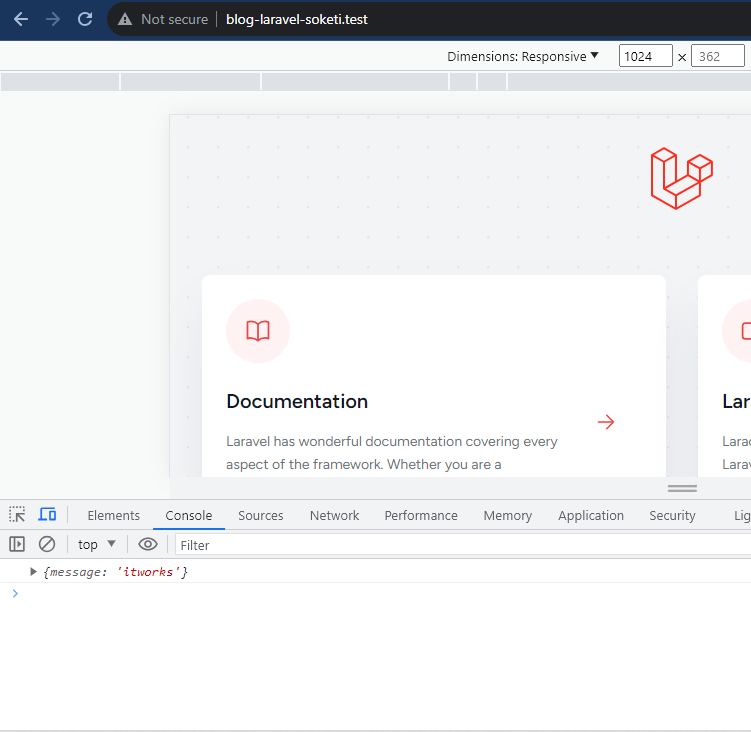
- Back to the home page tab and check the Dev Tools Console.
![home-receive-event.png]()
Congratulations! You’ve successfully set up the foundation for Laravel WebSockets using Soketi.
Conclusion
We’ve learned how to set up a WebSocket server, broadcast events, and make our app respond instantly to what users do. It’s like making your app come alive!
Real-time apps can do amazing things, like letting people chat instantly or work together smoothly. With Laravel and Soketi, you’ve got the tools to make these cool things happen. Happy coding!
💻 The repository for this example can be found at fajarwz/blog-laravel-soketi.

